Cheesy Pumpkin Cauliflower Side

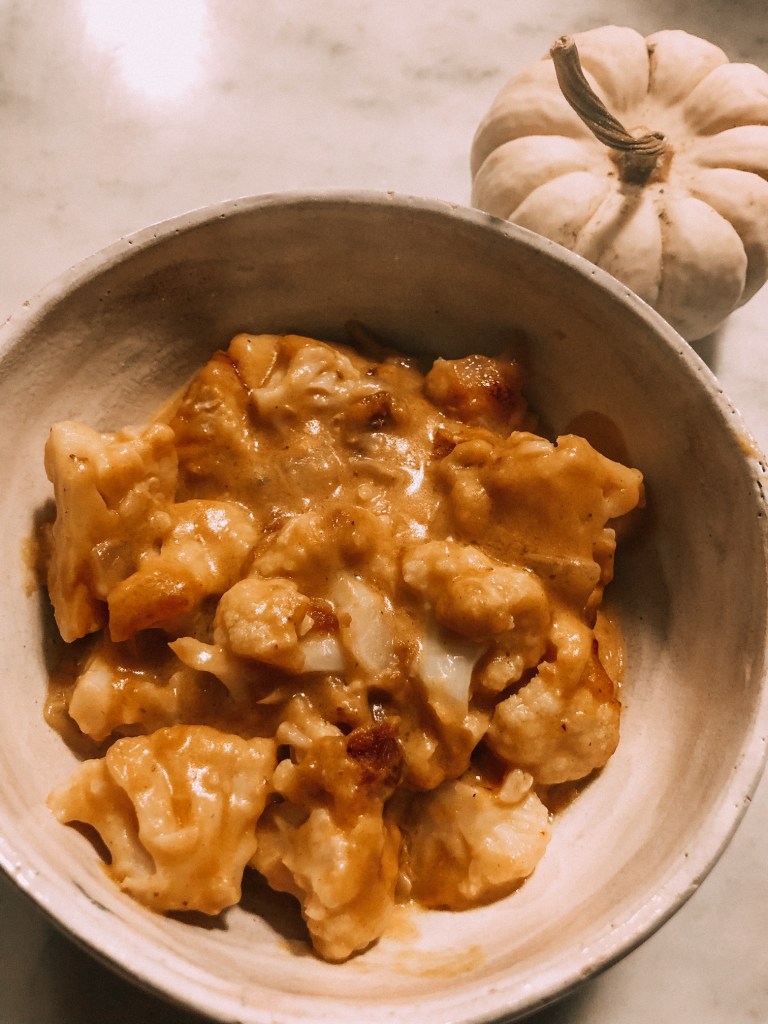
Now that it’s officially fall in Seattle and the rainy season seems to be upon us, we thought you all would enjoy some fall-themed comfort food. This side dish can be considered a gratin as it is baked in the oven and develops a cheesy, browned top. The combination of flavors creates a bold and filling dish that is great on its own or served up alongside your favorite Thanksgiving entrees.

Cheesy Pumpkin Cauliflower Side

  • Difficulty: easy
  • Rating: ★★★★★
  • Print

Ingredients

  • 1 Head of Cauliflower (cut into small pieces)
  • 2 Tbs Butter
  • ½ White Onion (diced)
  • 2 Tbs Gluten-Free All-Purpose Flour
  • 2 Tbs Olive Oil
  • 1 C Milk
  • 1 C Canned Pumpkin
  • ½ tsp Pepper
  • 1 tsp Salt
  • 1 tsp Paprika
  • ½ tsp Nutmeg
  • 2 C Shredded Swiss Cheese
  • Optional: GF Breadcrumbs

Directions

  1. Preheat the oven to 425 degrees. Cut the cauliflower into small pieces; you can leave a few larger ones for bigger bites if desired and set aside.
  2. Heat a large oven-safe skillet over medium heat. This will go in the oven, but you can transfer the contents to a standard casserole dish if you do not have an oven-safe skillet.
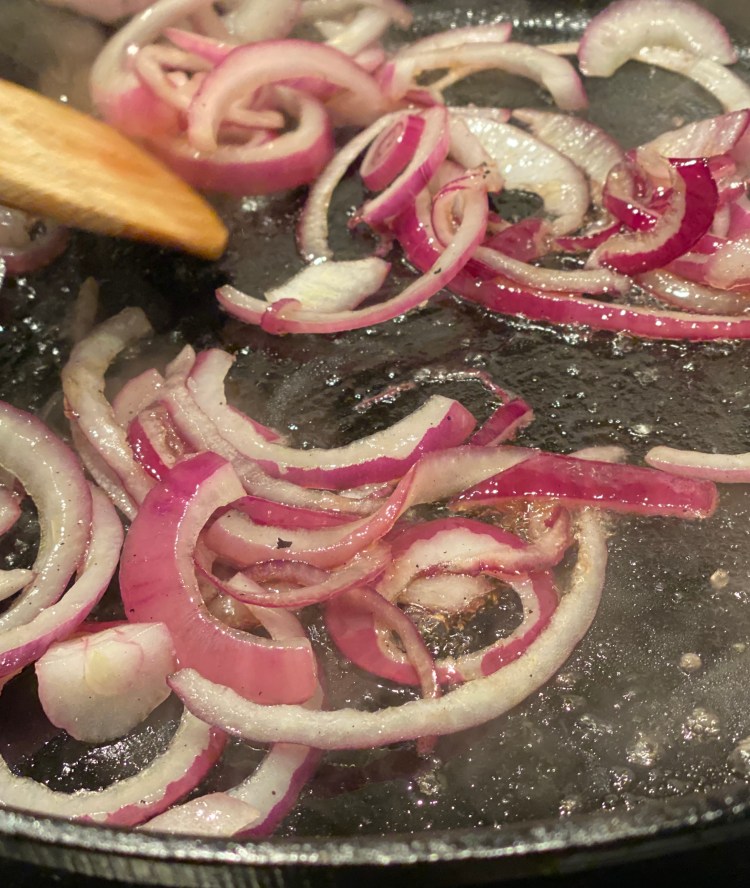
  3. Add the butter and allow it to melt. Add the diced onions and sauté for several minutes until they are softer and more transparent.
  4. Pour in the olive oil and add in the GF All-Purpose Flour. Continue sautéing for a few minutes until a paste forms.
  5. Stir in the milk, be sure to keep the heat low enough that no curdling occurs.
  6. Once the mixture is simmering, stir in the canned pumpkin, salt, pepper, paprika, and nutmeg.
  7. When the spices are combined, sprinkle in the swiss cheese slowly while stirring continuously. The mixture will appear thick, don’t worry! It smooths out into a thinner sauce in the oven.
  8. Add the cauliflower and stir until all pieces are coated in the mixture.
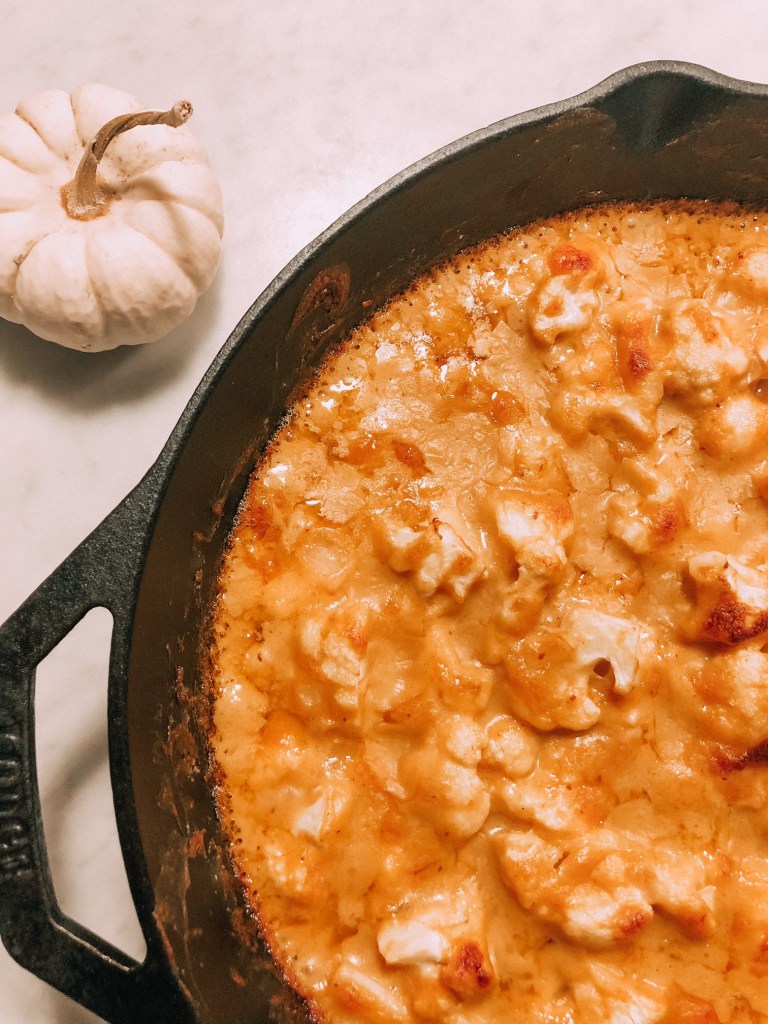
  9. Move the skillet to the oven or transfer the mixture to an oven-safe dish. You can sprinkle GF breadcrumbs on the top if you have them on hand.
  10. Bake for 25-30 minutes; if the top browns too quickly, cover with foil. Enjoy!

Advertisement

Stove Top Beef Tenderloin with Carmelized Red Onion Glaze

It is easy to use whole, fresh ingredients to make simple gourmet meals that don’t require hours in the kitchen to prep and then clean when the meal is over. And you can cook these meals at home for about one-third of what they would cost to eat out. Here is a yummy and easy dinner.

Stove Top Beef Tenderloin with Carmelized Red Onion Glaze

  • Servings: 4-6
  • Difficulty: easy
  • Rating: ★★★★★
  • Print

Whole, fresh ingredients make simple gourmet meals.

Ingredients

  • 2 – 4 beef tenderloin steaks, about 8 ounces each
  • 2 T olive oil
  • 1/2 red onion, thinly sliced
  • 1 T sugar
  • 1/2 t salt
  • 1/2 cup red wine
  • 1 T red wine vinegar
  • 2 T hot heat oil
  • salt and freshly ground pepper

Directions

Prepare the Carmelized Red Onions – Heat 2 T olive oil in a cast-iron skillet over medium heat. Add the sliced red onions, sugar, and salt and cook until onions are soft, about five minutes. Reduce heat, Add the red wine and stir until all of the red wine evaporates and the onion is tender – about five minutes. Stir in the vinegar and season with salt and pepper. Remove from skillet and set aside. Deglaze the skillet by pouring a cup of water in the hot skillet and stir to release caramelized bits stuck on the pan’s bottom. Pour out the water.

Cooking the Meat – Season both sides of the steak with salt and pepper. Heat the cast iron on high heat and add 2 T high heat oil until the skillet is very hot and the oil is smoking. Using tongs, add the steaks to the skillet. Cook until the side on the skillet is a deep brown, 3 to 5 minutes. Turn and cook on the other side until done to your preference. – 120 degrees for rare, 130 degrees for medium-rare, 140 – 145 degrees for medium. Move to a warm plate, cover with foil and a dish towel, and rest for five minutes.

Add the red onion garnish and serve.


I love my Cast Iron Skillet – so inexpensive and will last you forever. If you are purchasing a new one, season it first by cooking some yummy bacon. You can find Lodge Pre-Seasoned Cast Iron Skillet With Assist Handle, 10.25″, Black on Amazon.com.

Green Beans with Bacon

Green Beans with Bacon

  • Servings: 4-6
  • Difficulty: easy
  • Rating: ★★★★★
  • Print

A fresh, light, perfect side vegetable dish.

Ingredients

  • 1 T salt
  • 2 pounds fresh green beans
  • 3 slices bacon, diced
  • Fresh pepper

Directions

  1. Trim the stems of the beans and break into two-inch pieces.
  2. In a saucepan over medium heat, add the bacon and cook and stir until crisp. Add two cups of water and stir for a couple of minutes to release the cooked bacon into the liquid.
  3. Turn the heat to high and add two-three more cups water so that the beans will be almost covered with water when added. Add 1 T salt. Once a rapid boil is reached, stir in the beans and cook covered until your preferred texture, 5 minutes for crispier or 10 minutes for tender. Drain off the water.
  4. Season to taste with salt and pepper.

Nutrition


Gluten-Free Pumpkin Muffins

These muffins are more like a hearty breakfast bread than a cake-like dessert muffin. So so yummy!

Gluten Free Pumpkin Muffins

  • Servings: 12 muffins, 24 24 mini-muffins
  • Difficulty: easy
  • Rating: ★★★★★
  • Print

These muffins are more like a hearty breakfast bread than a cake-like dessert muffin. So so yummy!

Ingredients

  • 1 ¾ cup Gluten-Free Flour
  • ¼ cup GF coconut flour
  • 1 teaspoon baking soda
  • 2 teaspoons xanthan gum (only if not included in GF Flour mix)
  • 1 teaspoon GF baking powder
  • 1 teaspoon cinnamon
  • 1/8 teaspoon nutmeg
  • pinch of ground ginger
  • ½ teaspoon salt
  • ½ cup butter (use Earth Balance for dairy-free)
  • 1 1/3 cup packed light brown sugar
  • 2 eggs
  • 1 teaspoon vanilla
  • 1 cup pumpkin puree
  • 1/3 cup milk (use almond, soy, or coconut milk for dairy-free)
  • ½ cup chopped nuts or raisins (optional)

Directions

  1. Preheat the oven to 350 degrees F and generously grease 24 mini-muffin cups or 12 regular sized muffin tins.
  2. In a large bowl, whisk together the Gluten-Free Flour, Coconut Flour, baking soda, xanthan gum, baking powder, cinnamon, nutmeg, ginger, and salt until it becomes one uniform consistency. NOTE: If you are using a GF Flour that already includes xanthan gum you do not need to add it again). Also, if you do not have coconut flour, you can replace it with more Gluten Free Flour. I like the coconut flour because it increases the muffins’ fiber content, making the muffins seem more like hearty breakfast bread than a cake-like dessert muffin.
  3. In a separate bowl using an electric mixer, cream the butter until white.
  4. Add the sugar and beat until fluffy, about 5 minutes.
  5. Add the eggs, one at a time.
  6. Stir in the pumpkin puree.
  7. Stir in the dry ingredients in two parts, alternating with the milk.
  8. Add optional chopped nuts or raisins.
  9. Spoon the batter into the prepared muffin cups. Give the muffin tin a good tap or two on the counter to settle the mix.
  10. Bake at 350 degrees F for 15 -18 minutes.

    Let cool and drizzle with Cream Cheese Frosting.


Gluten Free Pumpkin Muffins
Recipe for Gluten Free Pumpkin Muffins

I like to use King Arthur Flour, Measure for Measure Flour, Certified Gluten-Free, Non-GMO Project Verified, Certified Kosher, 3 Pounds (Packaging May Vary) that you can order from Amazon.com. It includes xanthan gum so you will not need to add that as an extra ingredient.

Summer Salmon in an Iron Skillet

This is one of our new favorite recipes for the summer, and it is so easy! When completed and plated up, it feels like you are dining at a high-end restaurant. Just be sure to use a seasoned cast iron skillet and don’t ever overcook the salmon.

Summer Salmon in an Iron Skillet

  • Servings: 4
  • Difficulty: easy
  • Rating: ★★★★★
  • Print

A fresh, light, easy summer recipe.

Ingredients

  • 1 to 1.5 pound Salmon Filet
  • 1 T high heat cooking oil
  • 2 T butter (melted)
  • 1/2 teaspoon dill
  • one lemon – zest plus the juice
  • Cast Iron Skillet

Directions

  1. Preheat the oven to 350 degrees. Add the oil to the skillet and heat on the stovetop until very hot.
  2. In a small bowl, whisk together the melted lemon, dill, and juice from one lemon.
  3. Spoon over the top of the salmon. Top with lemon zest.
  4. Place the salmon skin-side down in the hot skillet and sear for 1 – 2 minutes. Carefully flip and sear the second side for 1 – 2 minutes. Once done, turn it back to the skin side down.
  5. Place in a preheated 350-degree oven for 3 – 4 minutes for a medium finish. Don’t overcook it!
  6. Remove and place on a clean serving plate with cover with foil. Add a dishtowel for extra insulation and let rest for five minutes.

Advertisements

My son is about to start his senior year of high school, and what should be a fun, coming-of-age year of activity, learning, and friendships, his first semester will be remote this year with his classes taking place at the dining room table. In this COVID world, where every day feels like a Wednesday, I wanted his last day of summer to feel somehow different. I offered to treat him, and his immediate request was for a trip to Pikes Place Market in Seattle for some humbow.

We live on the Eastside of Seattle and have only been downtown a few times since the beginning of COVID, and the Seattle riots and protests.

The Seattle we visited was markedly different from the vibrant, welcoming Seattle we love. Most of the stores are closed with boarded windows. Pikes Place Market is open again, but just barely with the walkways and streets virtually deserted.

After visiting his favorite hombow shop, we popped into the Market for some fresh salmon. There is something magical to me about a great fish shop, and part of the fun is to gaze upon the selection and imagine a dish centered around the various cuts and species of freshly harvested and filleted choices.

We went to Sure Foods Fish Market, and were surprised to see the volume of orders they were packing for next-day shipment. You can get anything from salmon filets, halibut, lingcod, oysters, and Dungeness crabs, to name a few, shipped fresh straight to your kitchen.

This is one of our new favorite recipes for the summer, and it is so easy! When completed and plated up, it feels like you are dining at a high-end restaurant. Just be sure to use a seasoned cast iron skillet and don’t ever overcook the salmon.

I love my Cast Iron Skillet – so inexpensive and will last you forever. If you are purchasing a new one, season it first by cooking some yummy bacon. You can find Lodge Pre-Seasoned Cast Iron Skillet With Assist Handle, 10.25″, Black on Amazon.com.

GF Zucchini Bread with Chocolate Chips

One of my favorite memories from childhood is when we used to go out and plant our big vegetable garden in the backyard in the spring. We would mix our own organic fertilizer, plant all the seeds, and take care of it throughout the summer. I was always so amazed at how much bigger our veggies would get than what you would see at a store and the biggest of all were our zucchini. As a kid, sometimes they felt as big as me!

I was so thrilled this week when my coworker brought me her own homegrown zucchini that looked just like mine growing up. I knew I had to put them to good use and here is one of my first zucchini recipes so far. Sadly, it only took about half of one she gave me, but that just means more to come!

Ingredients:

2 cups finely shredded zucchini

1/3 cup melted butter

½ cup plain Greek yogurt

¾ cup honey

2 eggs

2 tsp vanilla extract

1 ½ cups GF 1 to 1 baking flour

¼ cup cornstarch

1 tsp baking soda

½ tsp salt

1 tsp ground cinnamon

½ tsp ground nutmeg

¾ cup chocolate chips

Directions

  1. Grease the bottom and sides of a 5×9 inch bread pan and preheat the oven to 375 degrees.
  2. Shred zucchini and be sure to squeeze out the excess water and moisture. I usually wrap mine in a paper towel or two and squeeze it over the sink.
  3. Combine zucchini, melted butter, yogurt, honey, eggs, and vanilla extract to an upright mixer and mix at a low speed until combined.
  4. Whisk together dry ingredients – GF flour, cornstarch, baking soda, salt, cinnamon, nutmeg – in a separate bowl.
  5. Slowly add the dry ingredients to wet while the mixer is at a low speed until combined then stir in the chocolate chips.
  6. Pour the dough into the greased bread pan and bake for 45-50 minutes or until a knife comes out clean. It might split in the middle a little but that is okay. Cool for 15 minutes then move to a cooling rack. Enjoy!

Lemon Pound Cake

It is the perfect time of the year for lemon pound cake. Serve with fresh berries from your garden or local farm co-op.

Making a superior gluten-free lemon pound cake (fine-crumbed, rich, moist, and buttery) is not easy. The classic recipe—with just flour, butter, sugar, and eggs—contains no leavener.

After several rounds of testing at the American Test Kitchen, they developed this recipe that swaps out one stick of butter for an equal amount of cream cheese. Unlike butter, which separates into water and fat in the oven, cream cheese—which is much more stable—doesn’t cause the greasiness problem that plagues all-butter gluten-free pound cakes. 

To get the most lemon flavor, pulse the zest in the food processor with the sugar. 

Source: Reprinted with permission from The How Can It Be Gluten Free Cookbook: Revolutionary Techniques. Groundbreaking Recipes. with recipes developed by the team at America’s Test Kitchen. This recipe uses King Arthur Flour, Gluten Free. See it on Amazon.com by clicking the links above.

Gluten Free Lemon Pound Cake

  • Servings: one cake
  • Difficulty: medium
  • Rating: ★★★★★
  • Print

A perfect gluten free lemon pound cake.

Ingredients

  • 1 ¼ cup King Arthur Flour Multipurpose Flour, Gluten Free
  • 1 teaspoon baking powder
  • 1⁄2 teaspoon salt
  • 1⁄4 teaspoon xanthan gum
  • 8 3⁄4 ounces (1 1⁄4 cups) granulated sugar
  • 2 Tablespoons grated lemon zest plus 1 tablespoon juice (2 lemons)
  • 4 large eggs
  • 4 ounces cream cheese
  • 1 1⁄2 teaspoons vanilla extract
  • 8 Tablespoons unsalted butter, melted
  • For the Glaze:
  • 2 ounces (1⁄2 cup) confectioners’ sugar, sifted
  • 2 teaspoons lemon juice

Directions

  1. For the Cake: Adjust oven rack to middle position and heat oven to 350 degrees—grease and flour 8 1⁄2 by 4 1⁄2-inch loaf pan. Whisk flour blend, baking powder, salt, and xanthan gum together in a bowl.
  2. Pulse sugar and zest together in the food processor until combined, about five pulses. Add lemon juice, eggs, cream cheese, and vanilla and process until combined, about 15 seconds. With processor running, add melted butter in a steady stream until combined, about 20 seconds. Transfer mixture to a large bowl. Add flour blend mixture and whisk until batter is thoroughly combined and smooth.
  3. Pour batter into prepared pan. Bake 15 minutes. Reduce oven temperature to 325 degrees and bake until cake is golden brown and toothpick inserted into the center comes out clean, about 40 minutes, rotating pan halfway through baking. Let cake cool in pan on a wire rack for 10 minutes. Run a knife around edge of cake to loosen. Remove cake from pan and let cool completely on a rack, about 2 hours.
  4. For the Glaze: Whisk sugar and lemon juice together in a bowl until smooth. Spread glaze over the cake, allowing some to drip down the sides. Let glaze set for at least 15 minutes before serving. (Cake can be wrapped in plastic wrap and stored at room temperature for up to 2 days.)
  5. Variation: Lemon–Poppy Seed Pound Cake Add 1⁄3 cup poppy seeds to batter with flour blend mixture in step 2.


This recipe uses King Arthur Flour, Gluten Free. See it on Amazon.com by clicking the links above.

White Bean & Chicken Chili

Another family favorite. This is also great camping food! Cooks well in a dutch oven over an open fire.

White Bean & Chicken Chili

  • Servings: “4
  • Difficulty: easy
  • Rating: ★★★★★
  • Print

Ingredients


2 Tablespoons olive oil
3 garlic cloves, minced
2 medium onions, chopped
1 1/2 pound boneless, skinless chicken breast, cut into 1/2 inch pieces
1 4 ounces can diced green chilies
2 teaspoons ground cumin
1 1/2 teaspoons dried oregano
1/4 teaspoon red pepper flakes
6 cups cooked white beans, rinsed and drained
6 cups GF chicken broth
salt to taste
pepper to taste

Directions

  1. Heat olive oil in a large soup pot over medium-high heat.
  2. Add one onion and sauté’ until tender, about 5 minutes. Add minced garlic and two bay leaves. Saute for 2 minutes.
  3. Add chicken and cook until thoroughly cooked.
  4. Add green chilies, cumin, oregano, and red pepper flakes. Stir until well combined.
  5. Add beans, chicken broth, and one onion.
  6. Bring to a boil.
  7. Reduce heat and simmer for one hour.
  8. Add salt and pepper to taste.
  9. Serve warm with Tostitos and garnished with sour cream, cheddar cheese, or guacamole.

Advertisements

Gluten Free Chocolate Brownies

Looking for a quick and easy treat that you cannot mess up? Try these chocolate brownies.
We all know gluten-free baking can be tricky. How many of you have had a cookie sheet full of beautiful GF cookies go in the oven, only to spread like pancakes and drizzle off the side of the cookie sheet? That drives me crazy!
This recipe is super easy and tasty.
Make it extra special by drizzling some GF caramel sauce over the top or sprinkling with GF peppermint candies.

Gluten Free Chocolate Brownies

  • Servings: “one
  • Difficulty: easy
  • Rating: ★★★★★
  • Print

Ingredients

  • 5 oz. semisweet or bittersweet chocolate (use Enjoy Life Semi-Sweet Chocolate Chips for dairy-free)
  • 2 oz. GF unsweetened chocolate, chopped
  • 8 Tablespoons unsalted butter, cut into quarters (use 6 Tablespoons Earth Balance and 2 Tablespoons Coconut Oil for dairy-free)
  • 3 Tablespoons cocoa powder
  • 3 large eggs
  • 1¼ cups sugar
  • 2 teaspoons vanilla extract
  • ½ teaspoon salt
  • 1 cup GF Flour
  • If the GF flour does not contain xanthan gum, add 1/2 teaspoon xanthan gum to the GF flour

Directions

  1. Preheat the oven to 350° F and oil an 8-inch square baking dish.
  2. You can prepare the warm chocolate mix in two ways. The traditional method would be in a heatproof bowl set over a pan of barely simmering water, melt the chocolate and butter (or butter alternative), occasionally stirring until smooth. Whisk in the cocoa powder until smooth. Set aside to cool.
  3. The busy mom method is to add the two kinds of chocolate and butter (or butter alternative) in a microwave-proof bowl and microwave 20 seconds, stir and microwave another 20 seconds. Repeat if the chocolate is still not melted. Then stir in the cocoa powder.
  4. In a medium bowl, combine the eggs, sugar, vanilla, and salt; whisk until combined, about 15 seconds. Stir in the warm chocolate mixture until incorporated.
  5. Stir in the GF flour (and xanthan gum if needed) until just combined.
  6. Pour the mixture into the prepared pan and bounce it a couple of times on the counter to spread it evenly.
  7. Bake for 35 minutes or until a toothpick inserted in the center comes out with a small number of sticky crumbs clinging to it.
  8. Chill for a bit, but best served warm.

Advertisements

Corn Tortillas

We learned how to make gluten free tortillas on a family trip to Mexico. A great stand in for bread.

Corn Tortillas

  • Servings: “16
  • Difficulty: medium
  • Rating: ★★★★★
  • Print

Ingredients

  • 2 cups Maseca Flour
  • 1 cup water (plus more as needed to reach right consistency)
  • 1/4 cup canola oil
  • 1 teaspoon salt
  • waxed paper

Directions

  1. Combine the two cups of flour with the salt, water, and oil. The best way to combine this is to use your hands and squeeze it together as you would playdoh. If it is dry, add more water by tablespoons until it reaches a playdoh like consistency.
  2. Roll the dough into approximately sixteen round balls. Cover with a moistened towel so the flour will not dry out.
  3. The easiest way to make these is with a Cast Iron Tortilla Press, 8-Inch. Cut waxed paper into circles roughly the same size as the press. Line the tortilla press with waxed paper. Coat the wax paper with a tiny amount of oil. Place a dough ball on the waxed paper in the press and press until flattened into a disk.
  4. Alternatively, press a dough ball by rolling out the dough with a rolling pin between two sheets of waxed paper.
  5. Brush a little bit of oil on the tortilla, then cook on a griddle or skillet on medium-high heat. Cook until browned, then flip and cook the other side. They cook very quickly.
  6. Keep warm until you served.
  7. Store in the refrigerator for a day or two and warm before serving.

You can order Maseca Instant Yellow Corn Masa Flour from Amazon following the link above.

Order the 8 inch Cast Iron Tortilla Press from Amazon through this link.