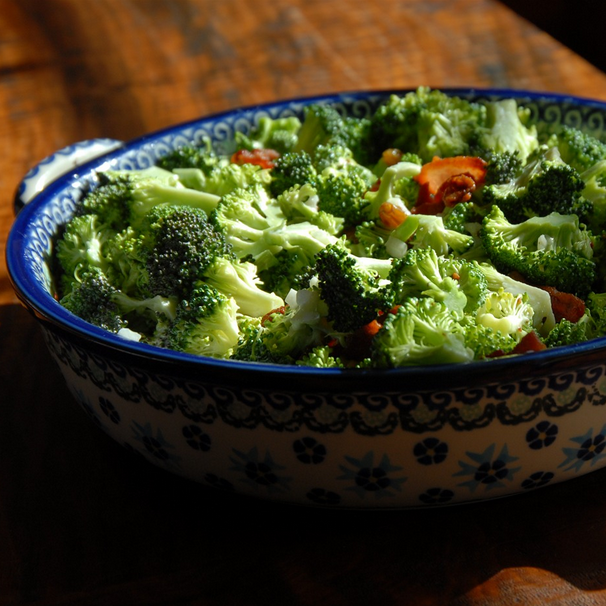
This is my Grandma Little’s recipe. She lived in Fremont, Nebraska. I remember hot midwest summers with hot dogs, deviled eggs, and her broccoli salad.
½ cup mayonnaise
¼ cup of sugar
2 Tablespoons cider vinegar
3 bunches of broccoli, rinsed and cut into small florets
¼ cup purple onion, finely chopped
1 lb. bacon, fried and crumbled
½ cup yellow raisins
½ cup sunflower seeds
Directions
1. Combine mayonnaise, sugar, and cider vinegar in a medium-sized bowl.
2. Add the broccoli, onion, bacon, raisins, and sunflower seeds and mix well.
3. Refrigerate 3 hours or overnight.
I miss my Grandma and hope that sharing her recipe makes her smile.
1/2 cup unsalted butter, softened (use Earth Balance for dairy free)
1 cup sugar
1 teaspoon vanilla extract
2 eggs
3 or 4 ripe bananas
2 cups Gluten Free flour
1 teaspoon xanthan gum (if not included in GF Flour Mix)
1 teaspoon baking soda
1/4 teaspoon salt
Directions
1. Preheat the oven to 350 degrees F.
2. Place the butter, sugar and vanilla in a large bowl. Beat on high speed until the mixture is light and fluffy. Add eggs, one at a time, mixing on medium speed until combined.
3. In a small separate bowl, mash the bananas with a fork. Add a Tablespoon of water if necessary to mix.
4. In a medium separate bowl, whisk together the GF flour, xanthan gum, baking soda and salt.
5. Alternate adding the bananas and the dry ingredients to the creamed mixture until blended.
6. Spoon the batter into a buttered 5 X 9 inch loaf pan.
7. Bake at 350 degrees F for one hour or until a knife inserted in the middle comes out clean.
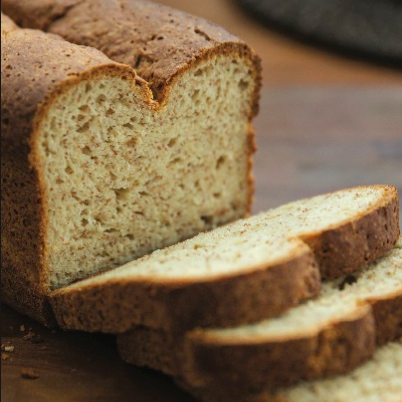
When we first went gluten-free, you could not find GF bread at the grocery store. We lived on rice cakes until Mom, that’s me, came up with a recipe for brown bread in the bread machine. I worked so hard on this recipe! It went through many trials and test runs. And even today, it still tastes better than the GF bread you can purchase at the grocery store.
1 ¼ teaspoon guar gum (if you do not have guar gum you can use an additional 1 1/4 t xanthan gum)
2 Tablespoons brown sugar
1 teaspoon salt
3 eggs
3 Tablespoons canola oil
2 teaspoons cider vinegar
2 Tablespoons honey
1 Tablespoon apple juice
Only use flours that are labeled Gluten Free.
Directions
1. Lightly grease a 9 x 5-inch loaf pan and dust with rice flour.
2. Prepare a Warm place for Bread to Rise.
I have found that my oven is a great place for bread to rise. When I start making the bread, I turn my oven on to its lowest setting. For my oven, it is 135 degrees. As soon as the oven preheats to this temperature, turn it off. By the time everything is mixed together, and in the bread pan, the oven is at a perfect temperature for the bread to rise. Caution – be careful with this procedure. If you put your dough in a place that is too warm, it will cook and not rise.
3. Proof the Yeast.
Fill a two-cup glass measuring cup with 1 ¼ cup milk and warm to 110 degrees F. I have found that 55 seconds in my microwave gets me the perfect temperature of around 110 – 115 degrees F.
Add 1 Tablespoon sugar and then sprinkle the yeast on top and give it a quick stir. Let it sit for 5 to 10 minutes. If it is working correctly, you will get a tannish foam on top of the liquid.
4. While yeast is proofing, thoroughly whisk together the dry ingredients to form one consistent texture.
Once the dry ingredients are well mixed, add to bowl on your stand mixer.
5. In a separate bowl, lightly beat the eggs and mix with the oil, vinegar, and honey. Mix well, then stir in the apple juice.
6. To the dry ingredients, add the wet mixture and then quickly add the proofed yeast. Mix until blended, stopping to scrape the sides of the bowl. Beat at high for 4 minutes. The dough will be just a little thicker than cake batter.
7. Spoon into the prepared baking pan, spray a piece of saran wrap with cooking spray and lightly cover. Put in a warm place (around 75 degrees) to rise for about 30 minutes.
8. Preheat the oven to 350 degrees F.
9. Once it has risen to the top of the bread pan, remove the saran wrap and bake at 350 degrees F for 40 minutes or until an internal temp of 200 degrees is reached.
10. Let cool in the pan for 10 minutes, then let cool on a bread rack. This bread is very moist, so if the sides and bottom of the bread seem “wet,” turn the bread on its top to rest, and the sides and bottom will dry out nicely.
Some of us face the double challenge of being on a dairy or casein-free diet and a gluten-free diet, frequently called the GFCF diet.
Shortly after going gluten-free, I realized I was also intolerant to dairy. I had undetected Celiac Disease for so long that it ruined the lining of my intestine.
I have been dairy-free and gluten-free for 16 years. This is one of my favorite recipes.
2 teaspoons ume plum vinegar (an excellent add-in for dairy-free recipes as it adds a salty cheese-like quality to cooking.)**see note below the recipe
1 minced garlic clove
1 teaspoon nutritional yeast (optional but strongly recommended as it adds a tremendous cheese-like flavor.)
1. With a fork, mix the coconut milk, eggs, vinegar, garlic, yeast, mustard powder, salt, and pepper. The powdery substances will be a little lumpy but mix as well as you can. They dissolve while baking.
2. Add the optional add-ins of sauteed vegetables or cooked and crumbled GF sausage to the unbaked gluten-free crust.
3. Add the egg mixture and top with green onions and thinly sliced tomato.
4. Bake for 45 minutes or until a knife inserted in the center comes out clean.
**You can find Vinegar Plum Ume on Amazon.com by clicking the link above.
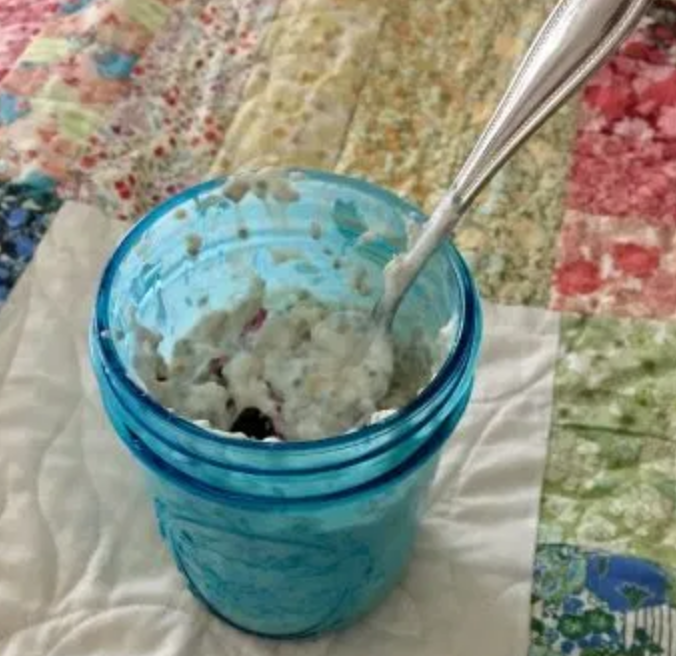
½ Cup Almond Milk (sweetened or unsweetened is up to you)
½ Cup Vanilla Greek Yogurt (or dairy-free alternative)
1 tsp Honey
A handful of berries
Directions
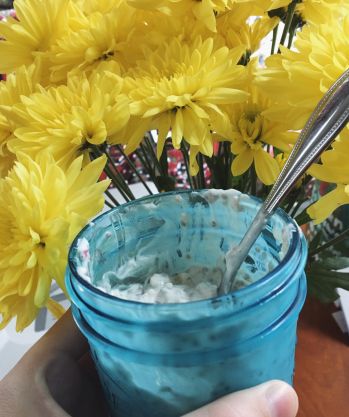
Add all ingredients except for the berries to a mason jar.
Stir and refrigerate overnight with the lid on the mason jar.
Remove from refrigerator, add berries, give it another stir and eat up.
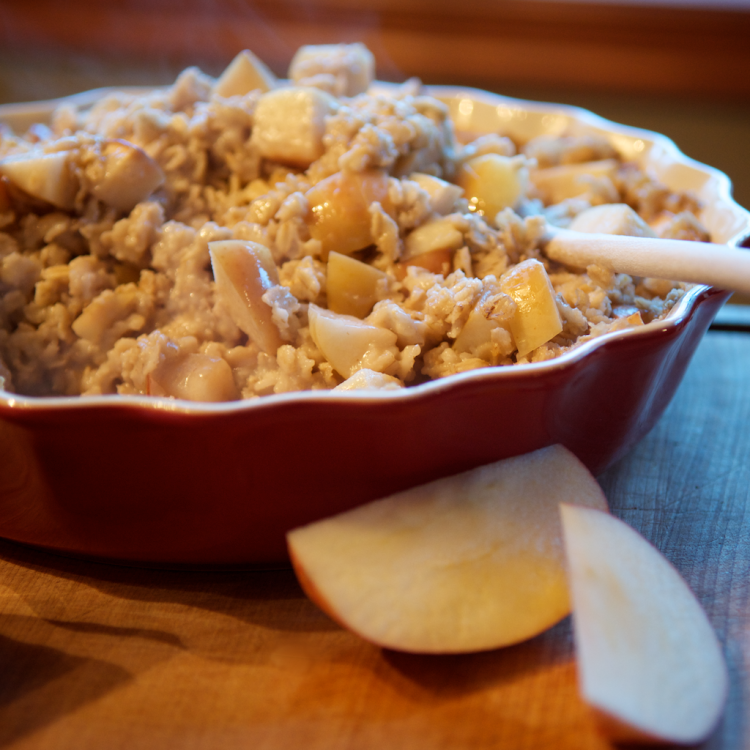
My best friend and I started working out at night and I would wake up starving in the morning. I needed something more filling to start my day and she suggested overnight oats.
Now whenever I know I am going to have a busy day and need that extra filling meal in the morning, overnight oats are my go to. They are so tasty and packed with goodness – especially with the added Chia Seeds in this recipe.
If you or a loved one is dairy free, substitute the Greek yogurt with a non-dairy yogurt alternative and it will be just as delicious.
1. Preheat the oven to 350° and butter a 2-quart casserole.
2. Peel and thinly slice six potatoes.
3. In a saucepan, melt butter. On medium heat, blend in GF flour, garlic salt, and pepper.
4. Stirring constantly, slowly add 2 ½ cups milk (I have noticed that GF flour seems to blend better at a higher temperature, so I add the flour and milk at a temperature that is a little higher than I’d use for traditional wheat flour).
5. Cook and stir until thick and bubbly.
6. Add the onions (optional) and cheese. Stir until just melted.
7. Arrange the potatoes in three layers and pour approximately ⅓ of the cheese sauce onto each layer.
8. Cover with tin foil and bake for 30 minutes.
9. Remove foil and bake for another 60 minutes or until potatoes are tender and cheese is crispy. Let cool for several minutes and eat up!
But then I remembered how beautiful fall can be in Seattle. The leaves change colors, football season is in full swing, sweater weather is back and we occasionally get a beautiful, crisp sunny day.
Whether you are stuck in the where-did-summer-go mindset and in need of some comfort food, or just want a hot and easy meal for the family – these potatoes are for you. Eat up and welcome to fall!
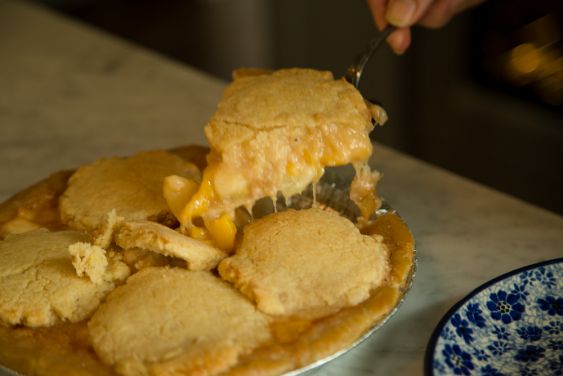
1. Start by baking Pamela’s Roll and Cut Sugar Cookies according to the instructions on the bag. Bake cookies for ten minutes and set aside. (You will have a few leftovers to snack on later).
2. Prepare the store-bought pie crust according to package directions
3. Turn the oven up to 425°
4. Wash, peel, pit, and slice the peaches into thin pieces. The easiest way I found to peel and pit peaches is by using a normal peeler you would use for potatoes. The skin starts to peel off in a long piece, especially when peaches are ripe. To remove the pit, I used an apple corer and pushed the pit out the bottom of the peach. It is messy and much faster with helpers.
5. Place sliced peaches in a large bowl. Add the lemon juice, sugar, cinnamon, nutmeg, salt, and cornstarch and mix. If you want a thicker mixture, add more cornstarch
6. Pour the peach mixture into your prepared pie crust.
7. Place the pie on the middle rack in the oven at 425° and bake for 25-30 minutes
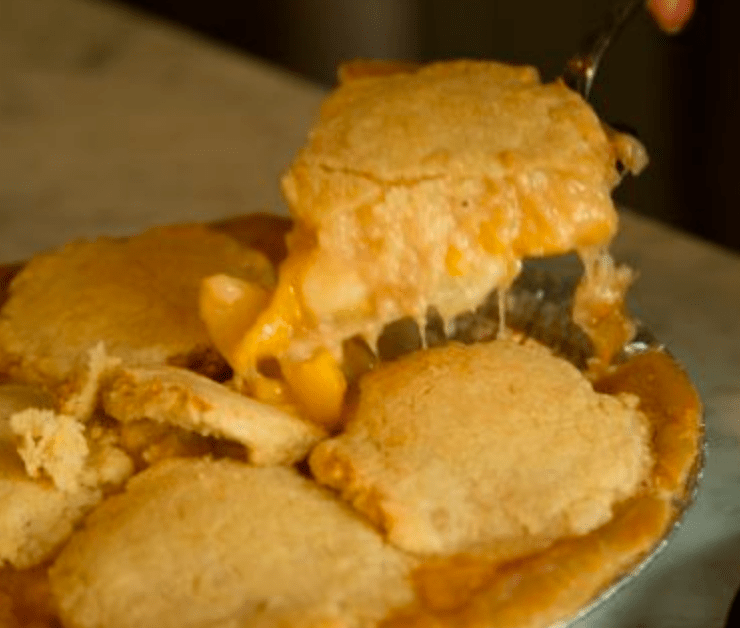
8. Remove the pie from the oven. Add your already baked sugar cookies to the top of the pie covering most of the pie filling. This is where the polka dot part comes from.
9. Turn the oven temperature down to 375°.
10. Place your pie with the cookies on the top back in the oven and bake for 25-30 minutes or until the cookies begin to brown. Remove and sprinkle with sugar.
11. Let cool for an hour or so, and dig in! Best served with vanilla ice cream on top.
Every year on my mom’s birthday growing up it was my job to make her a peach pie.
As most of you probably know, gluten free baking is not always successful and can be very frustrating at times.
So after a few failed attempts at making a pretty pie with a perfect lattice top I decided to try something new and combine my mom’s two favorite things: pie and sugar cookies. She loved it. Now every year when May 31st comes around, I make her my famous polka dot peach pie.
This past week I have been at home recovering from yet another oral surgery (a long story). My mom, as always, made me tons of smoothies and shakes until I was all healed up. As a little thank you, while peaches are still in season, I decided to make her favorite pie again and write about it for all of you.
Enjoy!
Alex
Advertisements
Step by Step Directions
1. Start by baking Pamela’s Roll and Cut Sugar Cookies according to the instructions on the bag. Bake cookies for ten minutes and set aside. (You will have a few leftovers to snack on later).
2. Prepare the store bought pie crust according to package directions
3. Turn the oven up to 425°
4. Wash, peel, pit, and slice the peaches into thin pieces. The easiest way I found to peel and pit peaches is using a typical peeler you would use for potatoes. The skin starts to peel off in a long piece, especially when peaches are ripe. To remove the pit I used an apple corer (see link below) and pushed the pit out the bottom of the peach. It is messy and much faster with helpers.
5. Place sliced peaches in a large bowl. Add the lemon juice, sugar, cinnamon, nutmeg, salt and cornstarch and mix together. If you want a thicker mixture, add more cornstarch
6. Pour the peach mixture into your prepared pie crust.
7. Place the pie on the middle rack in the oven at 425° and bake for 25-30 minutes
8. Remove the pie from the oven. Add your already baked sugar cookies to the top of the pie covering most of the pie filling. This is where the polka dot part comes from.
9. Turn the oven temperature down to 375°.
10. Place your pie with the cookies on top back in the oven and bake for 25-30 minutes or until the cookies begin to brown. Remove and sprinkle with sugar.
11. Let cool for an hour or so and dig in! Best served with vanilla ice cream on top.
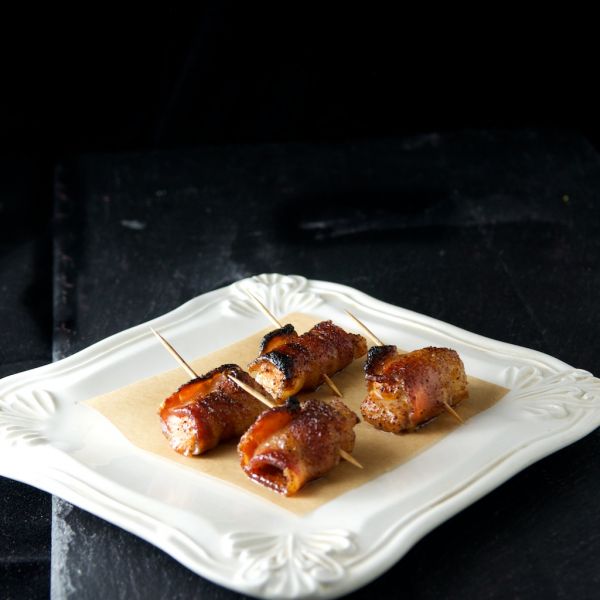
2 chicken breasts cut into bite sizes (you will get close to 30 pieces)
1 package GF bacon
toothpicks
1 cup brown sugar
2 Tablespoons chili powder
1 teaspoon salt
Directions
1. Preheat the oven to 375 degrees F.
2. Mix together the brown sugar, chili powder and salt.
3. Slice bacon into thirds. Wrap cut up chicken pieces in a third of a slice of bacon and secure with toothpick. Roll in sugar mixture.
4. Place on a rimmed baking tray (the bacon grease will spill over a non-rimmed sheet) that is lined with parchment paper.
5. Bake at 375 degrees F for 15-20 minutes. For crispier bacon, set under the broiler for a few minutes at the end. Keep an eye on it as the bacon will brown quickly under the broiler.
I grew up watching the Dallas Cowboys and then married a Kansas City Chief’s fan (they can get a little crazy), so Sunday football games have been a pretty standard part of my life.
When we moved to Seattle, we bought Seahawks season tickets, but I have only been to a few games. We only have two tickets, so it is usually my husband and one of the kids who go to the games. In the past, I have been known to read a book through a Seahawks game on Sunday afternoon.
Growing up one of my favorite parts about Halloween was baking with my mom. We used to make pumpkin spice cookies in the shape of ghosts with a recipe very similar to this so I wanted to share this one with all of you today.
3 Cups gluten free flour
1 tsp baking powder
1 tsp baking soda
1 Tbs pumpkin pie spice
½ tsp salt
½ Cup butter, softened
1 cup granulated sugar
½ cup brown sugar
1¼ cups canned pumpkin puree
1 egg
Directions
1. Preheat the oven to 350.
2. Mix together flour, baking powder, baking soda, pumpkin pie spice and salt in a large bowl.
3. In a separate bowl using an electric mixer, combine butter, granulated sugar, and brown sugar on a medium-high speed until fluffy (about 1 minute). Mix the pumpkin, egg and vanilla in at a medium speed until combined.
4. Slowly add more of the flour mixture to the butter mixture and stir together. If the mixture appears too runny, add in a bit more flour.
5. Cover your cookie sheet with parchment paper. These cookies run and expand a little while baking so it is important to put enough space between each cookie and not make them too big. Using a spoon or tablespoon measure, form cookies that are about 1-2 inches in diameter on your cookie sheet.
6. Put in the oven and bake for 15-20 minutes. Keep an eye on them and remove when the edges start to brown. To make sure they are down, lightly touch the top of the cookie and feel for a spongy texture. Let cool.
7. While your cookies are baking or cooling, mix together your frosting. Using an electric mixer on medium-high speed beat the cream cheese, butter and vanilla together until creamy. Slowly add in the powdered sugar until your frosting reaches a desired consistency. If you add too much powdered sugar and the frosting is too thick, simply add water or milk.
8. Once your cookies are cool, cover them in frosting and sprinkle a little pumpkin pie spice on top! Enjoy.
Our Halloweens as a kid were pretty similar every year – we would get together with some of our closest family friends and the dads would take us trick or treating while the moms stayed warm inside and drank spiked hot apple cider. 🙂
Then we would come back and empty our pillowcases of candy on the ground and show everyone how much candy we got and trade for our favorites. We would feast on candy and cookies before crashing and going to bed.
Looking back, getting to spend quality time with people I loved was really the best treat of all.